Sunday, June 21, 2020

5 sure fire ways to have a stellar classroom observation


teacher in classroom


Few things in life are certain, but in the world of teaching there is one guarantee: observations. Formal classroom observations can be daunting for everyone involved. You may find yourself planning and re-planning for all the ‘what-if’ scenarios your mind can drum up with all roads leading to confusion. It doesn’t have to be this way! While you may be wondering why we need our classroom to be observed, there are sure fire ways to have a stellar classroom observation true tips for giving yourself your best chance for success.

Teacher showing students how to complete activity


Tip 1: Have a clean beginning and ending
Something you want to be sure you demonstrate to administration is clear concise sequences in lessons. The clean beginning and ending is a major part of that. It doesn’t hurt that these activities serve a dual purpose too! For a beginning, a set activity like a warmup or bell ringer gives students the opportunity to jump start their focus. At the same time, it gives you, the educator, time for administrative duties like collecting homework and submitting attendance.

A great way to wrap up a lesson is with exit tickets! It not only shows administration that you have a clear ending for class, but afterwards you’ll be able to assess student learning needs to make the necessary adjustments. If songs or mnemonic devices are more your speed, this is also a great option which helps students retain information.


Tip 2: Have two to three student collaborations during class
Student collaboration is a great solution for those awkward pauses during instruction. Using the think-pair-share format, students are able to share ideas and work together to understand the material better. When the time comes for sharing out, students are often more apt to speak up. Without the pressure of having to share ideas they came up with alone, they feel empowered to participate!

The sweet spot for classroom collaboration is two to three times. This way, students still get the opportunity to collaborate, but not enough to encourage too excessive chatter, you get off topic or loss of your pacing.

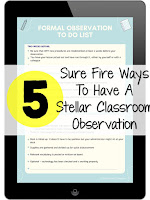
iPad with preview of the Observation Checklist Freebie


Tip 3: Perform a classroom temperature check at least twice during the lesson
Temperature checks just means make sure all of your students understand the material. Some teachers prefer to ask a question to the whole class then call on a specific student that knows the answer to show the class is learning. This works up to a point.

Usually, though, administration wants to know that everyone in the class is learning. What I like to do is have students use whiteboards. By posing a question to the entire class, they can somewhat anonymously answer the question by showing the answer only to you, the teacher. This really clears up any confusion about who understands the material and who needs further reinforcement. This method also assures that all students participate and be honest about where they’re at with the material.

I highly recommend this method, but a word of caution, don’t wait to use white boards for the first time on the day of your observation. Make sure this method is a part of classroom culture beforehand! You don’t want to wait until the day (or the week) of your formal classroom observation to implement this.


Tip 4: Always give students an opportunity to work independently
Quiet, independent work is helpful in seeing who is struggling and who may need remediation. A simple way to lead into independent work is by surprisingly through classroom collaboration. Allow students to work with a shoulder partner and depending on the group, they may also be able to pick their team partner. Once partners are selected, have them work with someone for a timed, five-minute period. After the five minutes is up, students should return to their seats and work individually. This is good for a few reasons.

students are collaborating on an activity


Tip #5: Check in with Students Individually
During this time, you can circulate, talk to them, look at their work, ask clarifying questions and make sure they understand. Many students absorb information better during collaboration, but application comes during independent work, particularly with exit tickets. These quick assessments allow students to process the information and allow you to see what adjustments to make to your teaching.


Do you feel ready for the next time your administrator comes by your room? Your students are going to benefit greatly from these improvements. For more tips, follow me on social media. If you want to save some time, check out my formal observation form freebie!


If you are wondering what to expect from your principal, click here for a behind the scenes look.  Or, for more project-based learning in your class, check out these tips from Edutopia.

5 surefire ways to have a stellar classroom observation


Thursday, May 21, 2020

Whiteboards - It's Easy to Do if You Do It Smart


white board on a student desk


Whiteboards in the classroom are so underrated. They are a fantastic way to make sure students understand the material being covered. This subtle classroom management tool helps curb off-topic conversations among students all while giving you insight on where to strengthen instruction. Whiteboards also come with a host of other benefits.

They often help:
 shy students be vocal and get participation points without having to raise their hand and speak.
 students who might be struggling to feel empowered. They can participate without the fear of feeling less smart than their classmates who know the answers.
 students who always know the answers can participate without becoming the loudest voices in the class.


Picture of dry erase markers in multiple colors
I 💓 chisel tip markers!


With the benefits in mind, you can make a sound decision on if it is for you and your students and how you would like to implement the practice. This includes what type of board you want for your classes. Be sure to select your board on criteria of cost and durability.


Your whiteboard options:
  • Dollar stores - If you are worried about the affordability of a class set, check local dollar stores and value shopping centers for low-cost options. While materials may not be bundled, it is possible to get a class set for $30 or less!
  • Teacher Supply Store - If dollar stores is not an option for you, another cost-effective option is card stock covered in 5mm laminate. For around$10, a class set can be made at local office or teacher supply stores. After the actual dry erase board, this is the sturdiest alternative. 
  • Page protectors - If you find yourself pressed for time and restricted by budget, you can always use printer paper inside of page protectors. This option isn’t as durable or mess free, but it gets the job done.

picture of a whiteboard with markers


Once you’ve selected your preferred whiteboard, it is time to establish guidelines of using whiteboards in class.


Some sample guidelines include:

 Whiteboards are only to be used for writing answers to the questions being asked. Only write on them when asked to or with permission.
 Dry erase markers are only for use on dry erase surfaces, not hands, books or paper.
 Everyone should try to answer the question with a response related to the subject. It’s okay to be unsure or incorrect, but an educated attempt is required.
 Once an answer is written, leave the whiteboard face down on the desk until instructed otherwise.

I highly recommend posting the guidelines in plain sight. This is great for you, those students that may have a hard time remembering and those that are visual learners. Using whiteboards with guidelines can be a little cumbersome in the beginning, but eventually, it becomes a part of the classroom culture.

Now that you’ve set up your guidelines, it is time to actually use the whiteboards.

5 Easy Steps to Using Whiteboard in Class

1. Have students set whiteboards face up with the markers on the desks while you ask the selected question. Once the question is asked, have them think about it for twenty seconds, enough time to think about the question and process it, then pick up the markers to respond. After students have written their answer, they are to put the whiteboards face down.


2. Have students show you their whiteboards when they’re done. This performs the temperature check and you can see who may not be connecting with the material.

3. After seeing all responses, have students return their board to face down and discuss their answers with a partner. If there is any confusion, this is a low-pressure opportunity to receive peer feedback without being called out in class. This is also when students are allowed to change answers. 


4. When partner collaboration is complete, ask one student to share their now correct answer and explain it. Those students that changed their answer will now have an opportunity to explain the correct answer which helps them retain the information.


5. Repeat! Walk through this process for two or three questions then move on with the main activity.


Using whiteboards is amazingly simple, but highly effective. Once incorporated into the fabric of the classroom, you’ll have the freedom to use this tool as a part of regular instruction and special occasions, like classroom observation.

How excited are you to try out these ideas? Your students are going to love using this in class, and I would love to see how you use this idea. Leave a comment below if you've tried this out or how you plan on using them 👍

Person writing on white board in a classroom


If you are looking for some great tips on using whiteboards in elementary grades, check out this great list!

Want more info on whiteboards being used in class? Check out this fantastic list of resources.

Friday, July 26, 2019

5 ways teachers can have a great first day of school


school supplies for the first day of school

Making back to school less stressful


On a scale of 1 to 5, how ready are you for the first day of school? Are you still in denial that everyone is buying supplies for back to school? Whether you are ready or not, the first day of school is right around the corner. But, it doesn’t have to be stressful! If you can get these 5 things ready, you will be ready to greet the students in no time at all.


#1 - you HAVE to get to know your students. You’ll be able to help your students so much more without even spending a dime. On the first day, have an “all about me” activity for the students to fill out. 

It’s great for three reasons:
1) it gives them something to work on while you check attendance and schedules;
2) it saves students the embarrassment of having to stand up and say something about themselves. And
3) you get to know so much more about them when you have it down on paper! In three months, you probably won’t remember what they said about their favorite food or what music they like to listen to. It’s a great way to get to know more about your students once you learned their names.

students get to know each other during the first week of school with bingo cards

#2 - Let your students get to know each other. Building relationships in class isn’t just for the teacher and students. Students need to get to know each other. Have you ever had students who struggled with material, and no matter how many different ways you tried to explain it? What about students who don’t get along and seem to argue over every little thing? A lot of that can be fixed before it even starts if the students feel like they are a team. They will want to help each other out when someone doesn’t understand the material, and the sometimes even go as far as to hold each other accountable when it comes to behavior.

students get to know each other during the first week of school with bingo cards


Have you ever worked a job where it seems like there were no rules? Employees came in whenever they pleased. If someone acted unprofessionally, they weren’t reprimanded, and the boss would impose rules as they saw fit. I bet you were mentally exhausted every day at that job because you didn’t know what to expect and whose rules to follow. It’s the same with students!

#3 - You have to set the guidelines and expectations for the classroom in order for it to run as smooth as possible. And remember consistency is the key! You don’t want students acting out because you enforced the rule for them but not someone else. It might take a full six weeks for students to catch on to the guidelines and expectations, but when they do, your life will be (somewhat) less stressful.


#4 - You didn’t forget about parent/teacher conferences, did you? Whether you are an experienced teacher or a newbie, getting ready for a parent/teacher conference can be overwhelming. You are never sure how it will go, and you aren’t always sure how to communicate to parents the not-so-nice things that they need to know. The best way to combat all of this is to have a parent/teacher conference agenda. I like to put mine on a handout that I can give to parents so they can fill out the info as we go along. Also, having an agenda set will keep the parents on track and prevent the conference from turning into an hour-long complaint-fest. Of course, you want to allot time for the parents to address their concerns but leave it towards the end so if gives you a chance to proactively answer any questions they have.

parent - teacher conferences are less stressful with these student information sheets


#5 - Have you ever had perfect attendance at work? If you are like me, I’m sure you will have to call in sick at some point. Sometimes you know ahead of time when you will be out, but a lot of times you don’t know until the flu hits you at midnight (kids and their germs!) So why not go ahead and get your substitute binder ready now instead of when you have a fever and trying to call in a sub? Some of the things you want to include are
  • a list of your procedures. You spent all this time getting your students accustomed to your procedures. Don’t let them all fly out the window the day you aren’t there
  • a class schedule. The sub needs to know when class begins and ends, and most importantly, when to eat lunch.
  • class descriptions (and the responsible students). Is your first class of the day still sleepy and therefore pretty compliant? Is your last class mostly boys who just came from gym class and VERY rowdy? Be nice to the sub and give them a heads up on what to expect. and while you’re at it, give them the names of 2-3 responsible students in case anything happens.


If you take the time to organize these activities and supplies, you will be setting yourself up for a fantastic year! If you are a history teacher looking for a ready-to-use items to get you ready for the year, check out my Back to School Activities pack. This first week starter pack will help you learn about your students while they learn about how your classroom operates.
The activities included are:
  • SLANT poster
  • Who am I? student information sheet
  • Icebreakers (2 different activities! Students BINGO and I have/who has?)
  • Class procedures PowerPoint (EDITABLE!)
  • test corrections
  • Parent/Teacher Conference sheets
  • 50 state banners (includes the motto, an outline of the state, and the date and order in which it was admitted to the union)
  • Open House PowerPoint (2 EDITABLE versions!)
  • Open House sign-in sheet (English and Spanish)


Sunday, December 2, 2018

How to Analyze DBQs in the Pre-AP and AP Classroom

Document-Based Questions made easy


Usually, the biggest problem teachers face when teaching their students to analyze DBQs (document-based questions) is which acronym to use. Should I use HIPP since that is on the AP exam? Or SOAPSTone because that is what another teacher likes to use?


In reality, it doesn’t matter what you use, but at the same time, it does. You’re probably thinking, Wait, what? That isn’t helping me! The biggest problem I encountered was not making sure my students became comfortable with one analysis acronym before moving on to the next. I wanted to use all of the acronyms! This week SOAPSTone, next week APPARTS, then next month was OPTIC. But that was the problem. My students never had a chance to feel successful with analysis before I threw something else at them. My poor eighth graders. I am glad they were so forgiving. 


This is where you get to learn from my mistakes! If you follow these steps, when March rolls around and your students are arguing with a friend over which acronym is better for analysis, then you know they have arrived.

1. Pick an acronym. Sounds simple enough. You can pick the acronym you like the most, or you can pick up my History Helper and I do all the work for you!  I started with SOAPSTone because I had a high number of English Language Learners, and I was more comfortable with SOAPSTone. Either way, pick one that you can implement for at a month. 

2. Practice annotating at least once a week as a class. Students need to hear your thought process as you go through the analysis. I used to put the DBQ under my document camera and project it on the screen. Then, as I went through each letter, I would have the students discuss the answer with their table partner. Here is an example of the conversation I would have with the class. I am going to use the Boston Massacre engraving by Paul Revere as an example:
Me: “So who is the speaker? Who created this? Most artists sign their work, and it is usually around the edge of the art. So, take a look at the picture and then discuss your answer with your shoulder partner.”

Students discuss answer

Me: “Then, write your answer on the small white board on your desk
Students write Paul Revere on their white boards, and we discuss how they knew the answer. 

Me: “What was the occasion for this engraving? What was going on during this time? What clues do you see to support your answer?”

Students discuss answer

Me: “Now, write your answer on the small white board on your desk

Students discuss the American Revolution. The evidence in the engraving are the redcoats worn by the soldiers and the church in the background of Boston.

This continues until I have made it through the entire SOAPSTone acronym. It is really important for students to have the opportunity to discuss their answers with a classmate because it takes helps them process their thoughts. A lot of students are not given the opportunity to think aloud. I also encourage the use of white boards for each set of partners. This allows the shy kids to participate without becoming anxious, it keeps the class a bit quieter (if only for a few seconds!) and also allows you to do a quick check for understanding.

You don’t have to take this long approach each time. If you have a class that just gets it, slowly ease them into analyzing on their own with less guidance from you.

3.Change up the acronym. After about a month, or until your kiddos can analyze using the first acronym pretty easily, it’s time to throw another acronym at them. Maybe you decide to try APPARTS with them. Follow the same steps as before. But this time, switch back and forth between the first acronym you taught them and the current one. Just because they learned one thing doesn’t mean it is on the back burner forever. When you have the students practice a DBQ analysis on their own, allow them to choose which acronym they want to use. I would make copies of the SOAPSTone analysis and the APPARTS and tell the kids that it was their choice. It was an extra five minutes on my part to create an extra answer key, but I knew down the road, the students wouldn’t forget how to use either one.


4. Keep repeating step 3 until students are familiar with all the major acronyms. I even got the language arts teacher in on using the acronyms in her class. Everyone knew that my students knew how to use them, and so there was no argument from the kids about “I don’t know what to do.” It also helped the students when they use the acronyms to analyze information from a different subject. Processing the information in new ways helped them retain that information in their long-term memory. 

Stay tuned to learn more about using DBQs in the history classroom!

How to analyze document-based questions

Wednesday, November 7, 2018

How do I use a DBQ with my students?

pictures with a students notebook


Have you ever had that moment in class where you are introducing a DBQ essay and you realize your students are looking at you like you have three heads 👽? Not only do you realize that your entire lesson for the day is officially out the window, you also have to come up with something on the fly to walk your students through a DBQ and what it is. You have to remediate and you have no clue where to start.

It can be a daunting task when you have a regular class, but you have ELLs, SpEd kids, and a group of 40 kids crammed in your room.

Fear not! I am going to break down the DBQ essay process in this four-part blog series, and you will be able to get your students up to speed even if you are in the second semester and testing is around the corner.

This four-part series will cover how to incorporate:
1) teaching students how to annotate
2) analyzing the DBQ itself
3) writing the DBQ essay
4) peer editing

So let's jump in with annotating! Many students think that annotating is simply a skill used in ELA, but it is essential in the history classroom.When teaching students how to annotate a reading or a DBQ, you have to implement it consistently. That is where many teachers fall short (myself included!). They go over annotation, then forget about it after the lesson was over. Until it is a few weeks later and time to practice annotating again. They expect the students to magically remember what to do, but then the teacher gets mad at them self for not reviewing it.

How can you be consistent? One way is to incorporate annotating into everyday activities. This can be done with warm-ups/bellringers, exit tickets, and homework. You want the students to be so used to annotating DBQs and readings that they start doing it in other classes. You want them to come up to you at school and tell you how they annotated something in their sleep.

To start off practicing with your students,

1) pick 6-10 DBQs that pertain to a time period you (preferably) have already covered. The DBQs should be a picture of pictures and quotes/readings.

2) Cut them out and place them all on the same sheet of paper. Make it double-sided if needed.

3) make a copy for each student

4) As a class, go through the first document together. Explain what your expectations are when it comes to annotating (I like to color-code, personally). Are you lost as to what students need to know? Try out my Pre-AP/AP History Helper so students have a easy guide to reference!

5) Have students practice the second document with a partner, then review it together as a class. What did they get right? What was missed?

6) Allow students to complete the next few on their own, but also to check with a partner if they want. It makes the activity a little less overwhelming if they know they can ask a friend.

It will probably being quite a painfully slow process at first. But if you spend the time to make sure that your students truly feel comfortable with annotating, it will pay off in the long run. But once again, BE CONSISTENT! Annotate at least three times a week.

Next week, how to analyze the actual DBQ...

Wednesday, October 10, 2018

How do I use word walls?

scrabble tiles on a blue background


Word walls. 

The name doesn't invoke excitement, and usually brings to mind thoughts of gray cinder block walls. Walls that you would cover with random words in order to appease your administrators. You've probably seen other teacher's classrooms Pinterest-worthy word walls decorated with beautiful, color-coded words. 

Ever feel like you were missing out and not sure where to start? 

I was there. I didn't know how to use word walls. I didn't know how to choose words.

Thankfully, after going to a few professional developments, I found out how to use word walls. And it was pretty interesting! Some of my big takeaways:

1) You have to interact with the word wall. Every. Day. And I don't mean pointing to the wall and moving on. You have to make the word wall part of the lesson. When introducing new words to the students, put the words at the front of the room, on the board, or wherever you stand. Students need to use the word 10-15 times before it is internalized. I suggest introducing no more than 3 words in a class period. I know that can be tough when it seems like we have to teach everything and then some. But the important thing to remember is that it is better for the students to learn a few words REALLY well, than a lot of words they barely recognize.

2) Make the words accessible to the kids to look at (and even touch!) I know as a teacher, we value the items we put in our classroom. Majority of the time, we use our own hard-earned money for supplies. We definitely do NOT want students touching our stuff. Who knows the last time they washed their hands? 😷 But, a lot of students are tactile/kinesthetic learners. Have the words posted on a wall where students can see it from their seats, but isn't blocked by desks. You'll be surprised at how many go up to the wall during activities or to check out the pictures.

3) Speaking of pictures, use pictures in your words wall. You have no idea how much this helps struggling students and English Language Learners. You might have students who are under 504 or are struggling with history because they don't like the subject. Or, you might have English Language Learners who are trying to grasp not only conversational English, but academic vocabulary as well. We want to make sure we are doing everything we can to help them out. 


So now you are probably thinking, Great idea, Tori! But I am soooooo busy! Not a problem! Check out my word walls and let me do the heavy lifting for you! My U.S. History word walls are TEKS-aligned and include pictures and definitions so you can focus on teaching!

Summarizing Like a Boss: Five Strategies to Up Your Game

  Attention teachers! Do you find yourself receiving long-winded paragraph answers from your students that seem to go nowhere? Does it seem ...